Installation
▤ MarkdownInstall SpringBrand in Cursor
Use SpringBrand tools in Cursor.
1. Sign up or sign in
Create a SpringBrand account, or sign in if you already have one.
2. Install SpringBrand
Install through your Agent
Paste this prompt into a new conversation in Cursor:
Install or update SpringBrand in Cursor using https://plugin.springbrand.ai/INSTALL.md.Enable Full Access before installation begins so your Agent can install SpringBrand and save its connection settings.
For a terminal-based setup, use the CLI steps below.
3. Authorize the connection
When your Agent asks to connect your account, choose an authorization method:
- API key: open Account Settings → MCP API Keys, then click View installation key or Create key. Provide the key when your Agent asks.
- Browser sign-in: ask your Agent to use browser sign-in, then complete the authorization in your browser. Keep the setup conversation open until your Agent confirms the connection.
4. Start using SpringBrand
When your Agent confirms that setup is complete, restart Cursor and open a new conversation.
Show me the SpringBrand tools available in this conversation.Once the tools are available, try your first task. If they are missing, see Troubleshooting.
Optional: set up from the terminal
With Node.js and npm installed, run each command separately. Continue only when both succeed:
npm install -g @springbrand/cli@latestsp --versionConnect your account with an API key or browser sign-in:
Connect with an API key
Copy a key from Account Settings → MCP API Keys. Replace {{INSTALL_KEY}} below with your key, then run:
sp connect cursor --url https://connector.springbrand.ai/mcp --api-key {{INSTALL_KEY}} --jsonOr use browser sign-in
For browser sign-in (OAuth), run:
sp connect cursor --url https://connector.springbrand.ai/mcp --jsonRun the login command printed in the output, if there is one, then authorize access in your browser. Keep the terminal open until sign-in finishes.
Complete any remaining connection checks shown in the output, then restart Cursor and open a new conversation. For errors or unfinished setup, see Manual installation checks.
Optional: manual MCP installation in Cursor
Follow this illustrated guide to add SpringBrand directly in Cursor MCP settings.
1. Open Cursor MCP settings
In Cursor, open Customize → MCPs, then select New MCP Server. Choose User for all projects or your workspace for this project only. Cursor opens an mcp.json file.
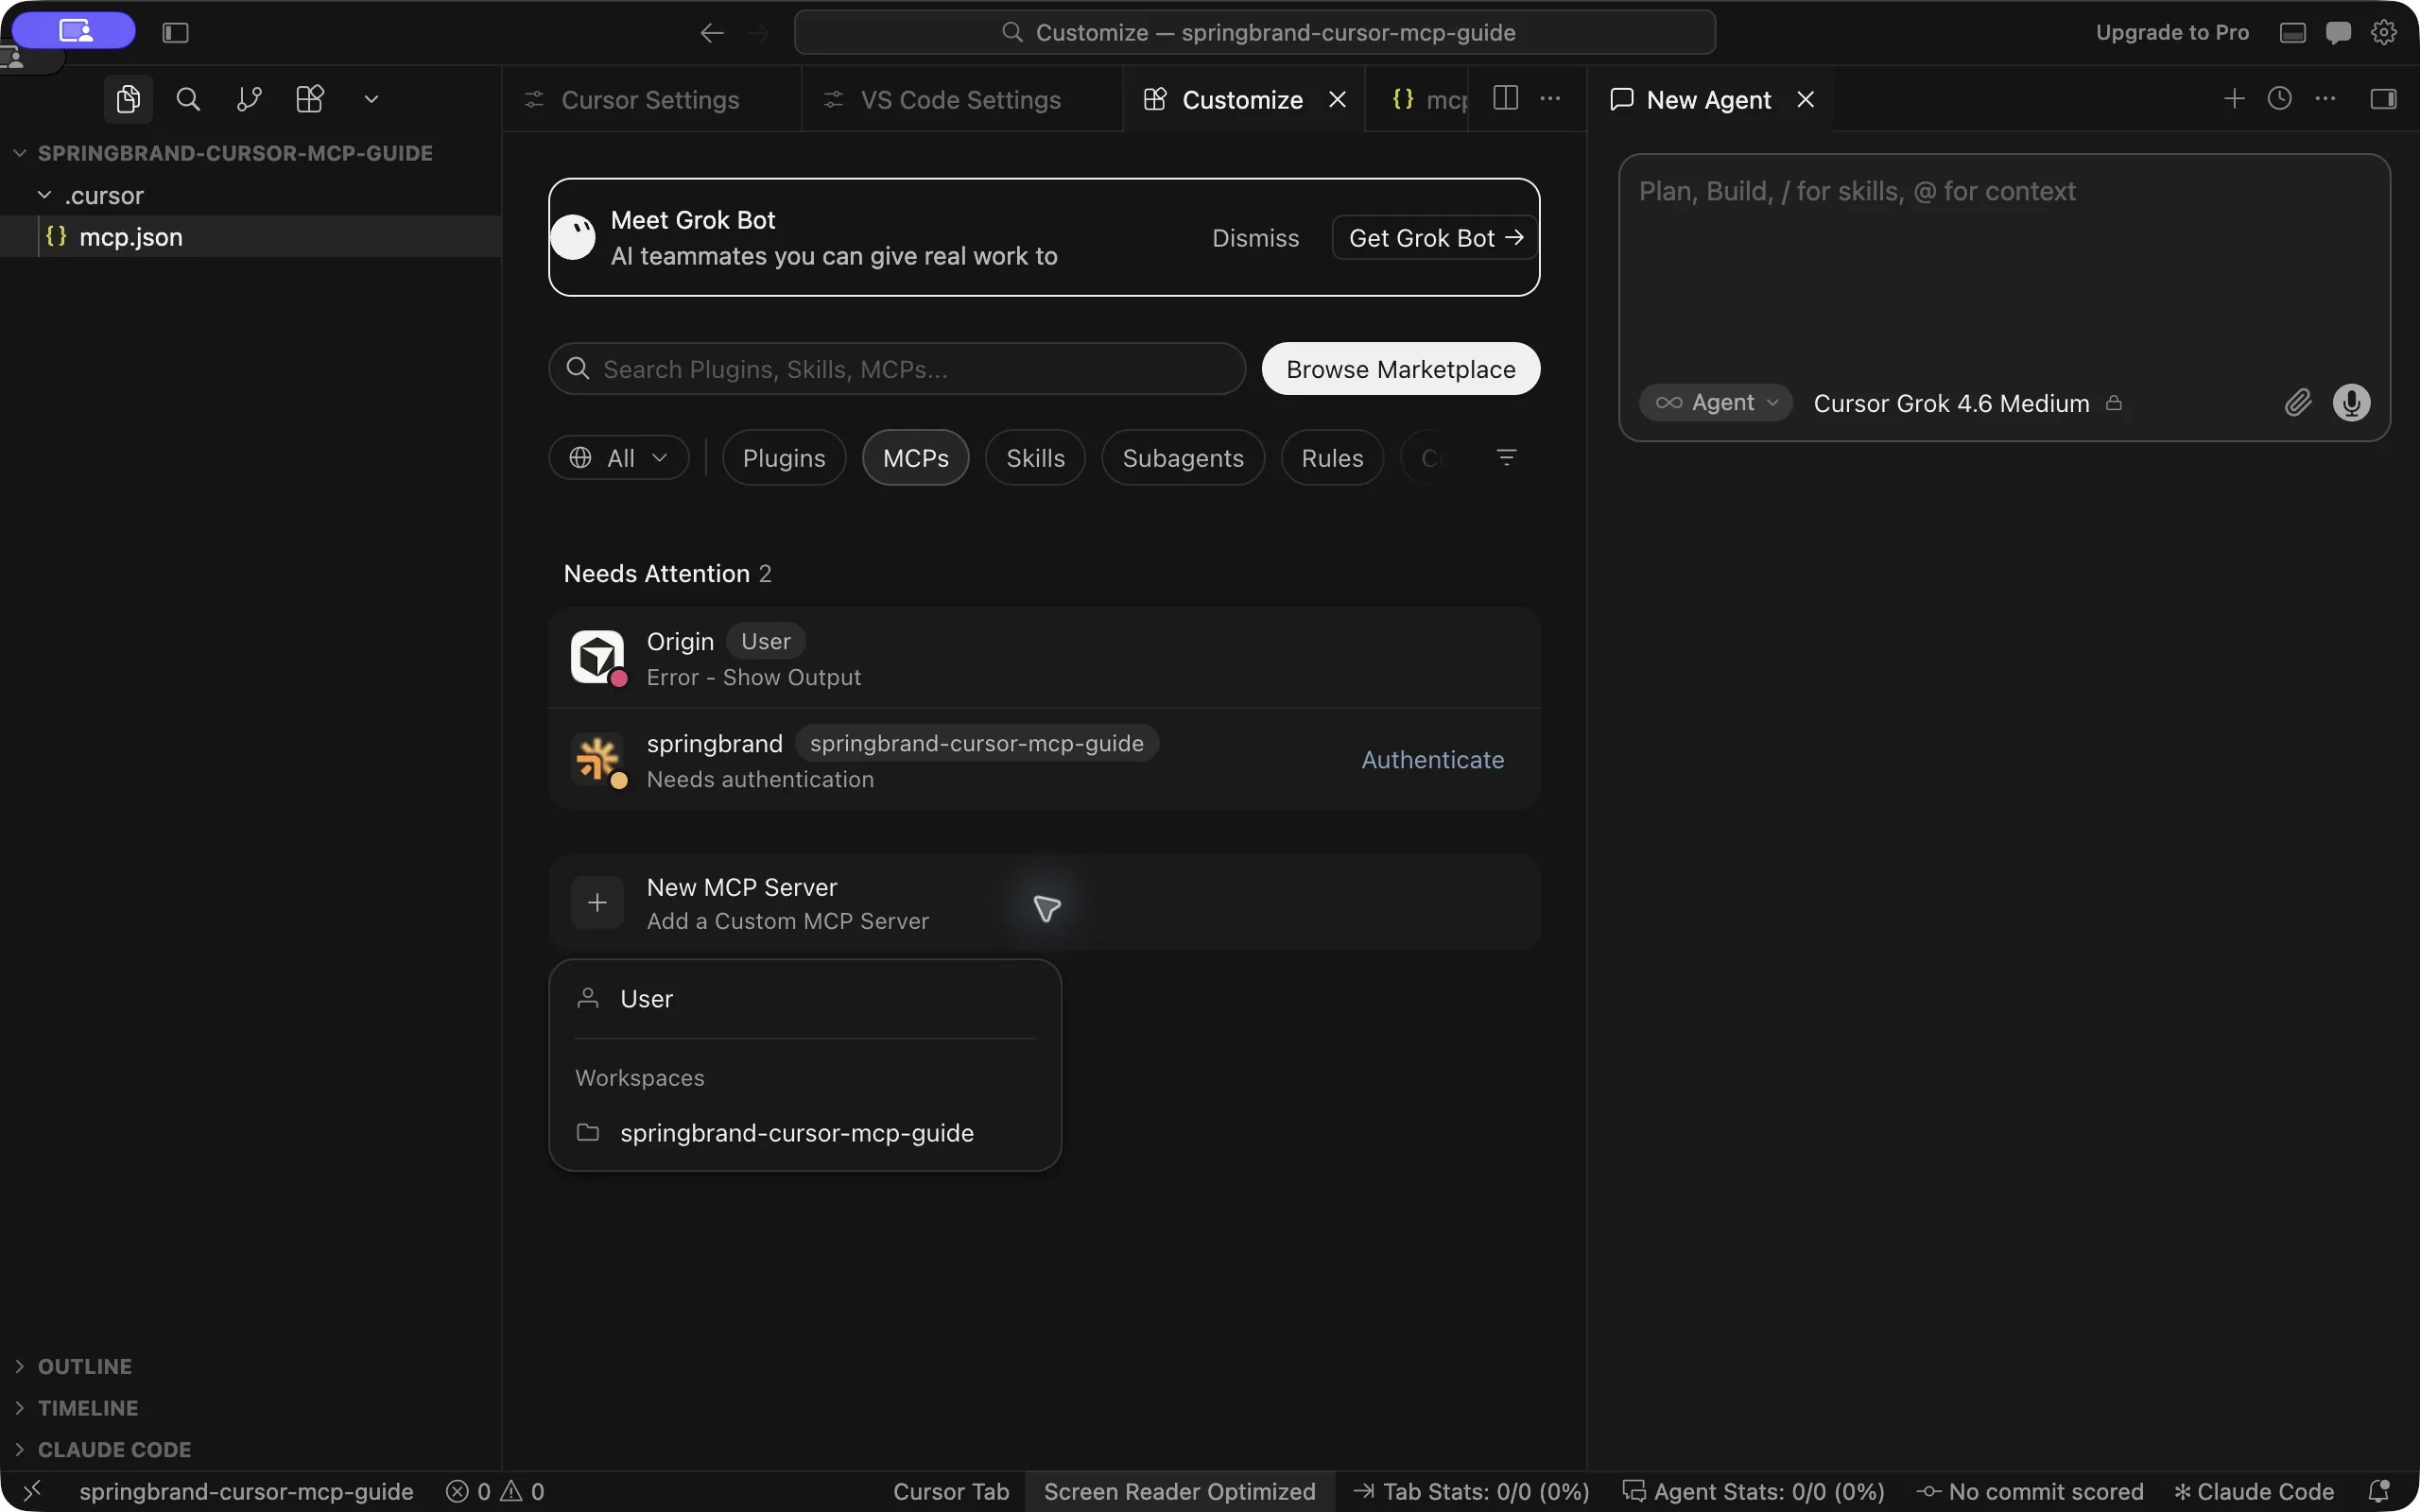
2. Add the SpringBrand server
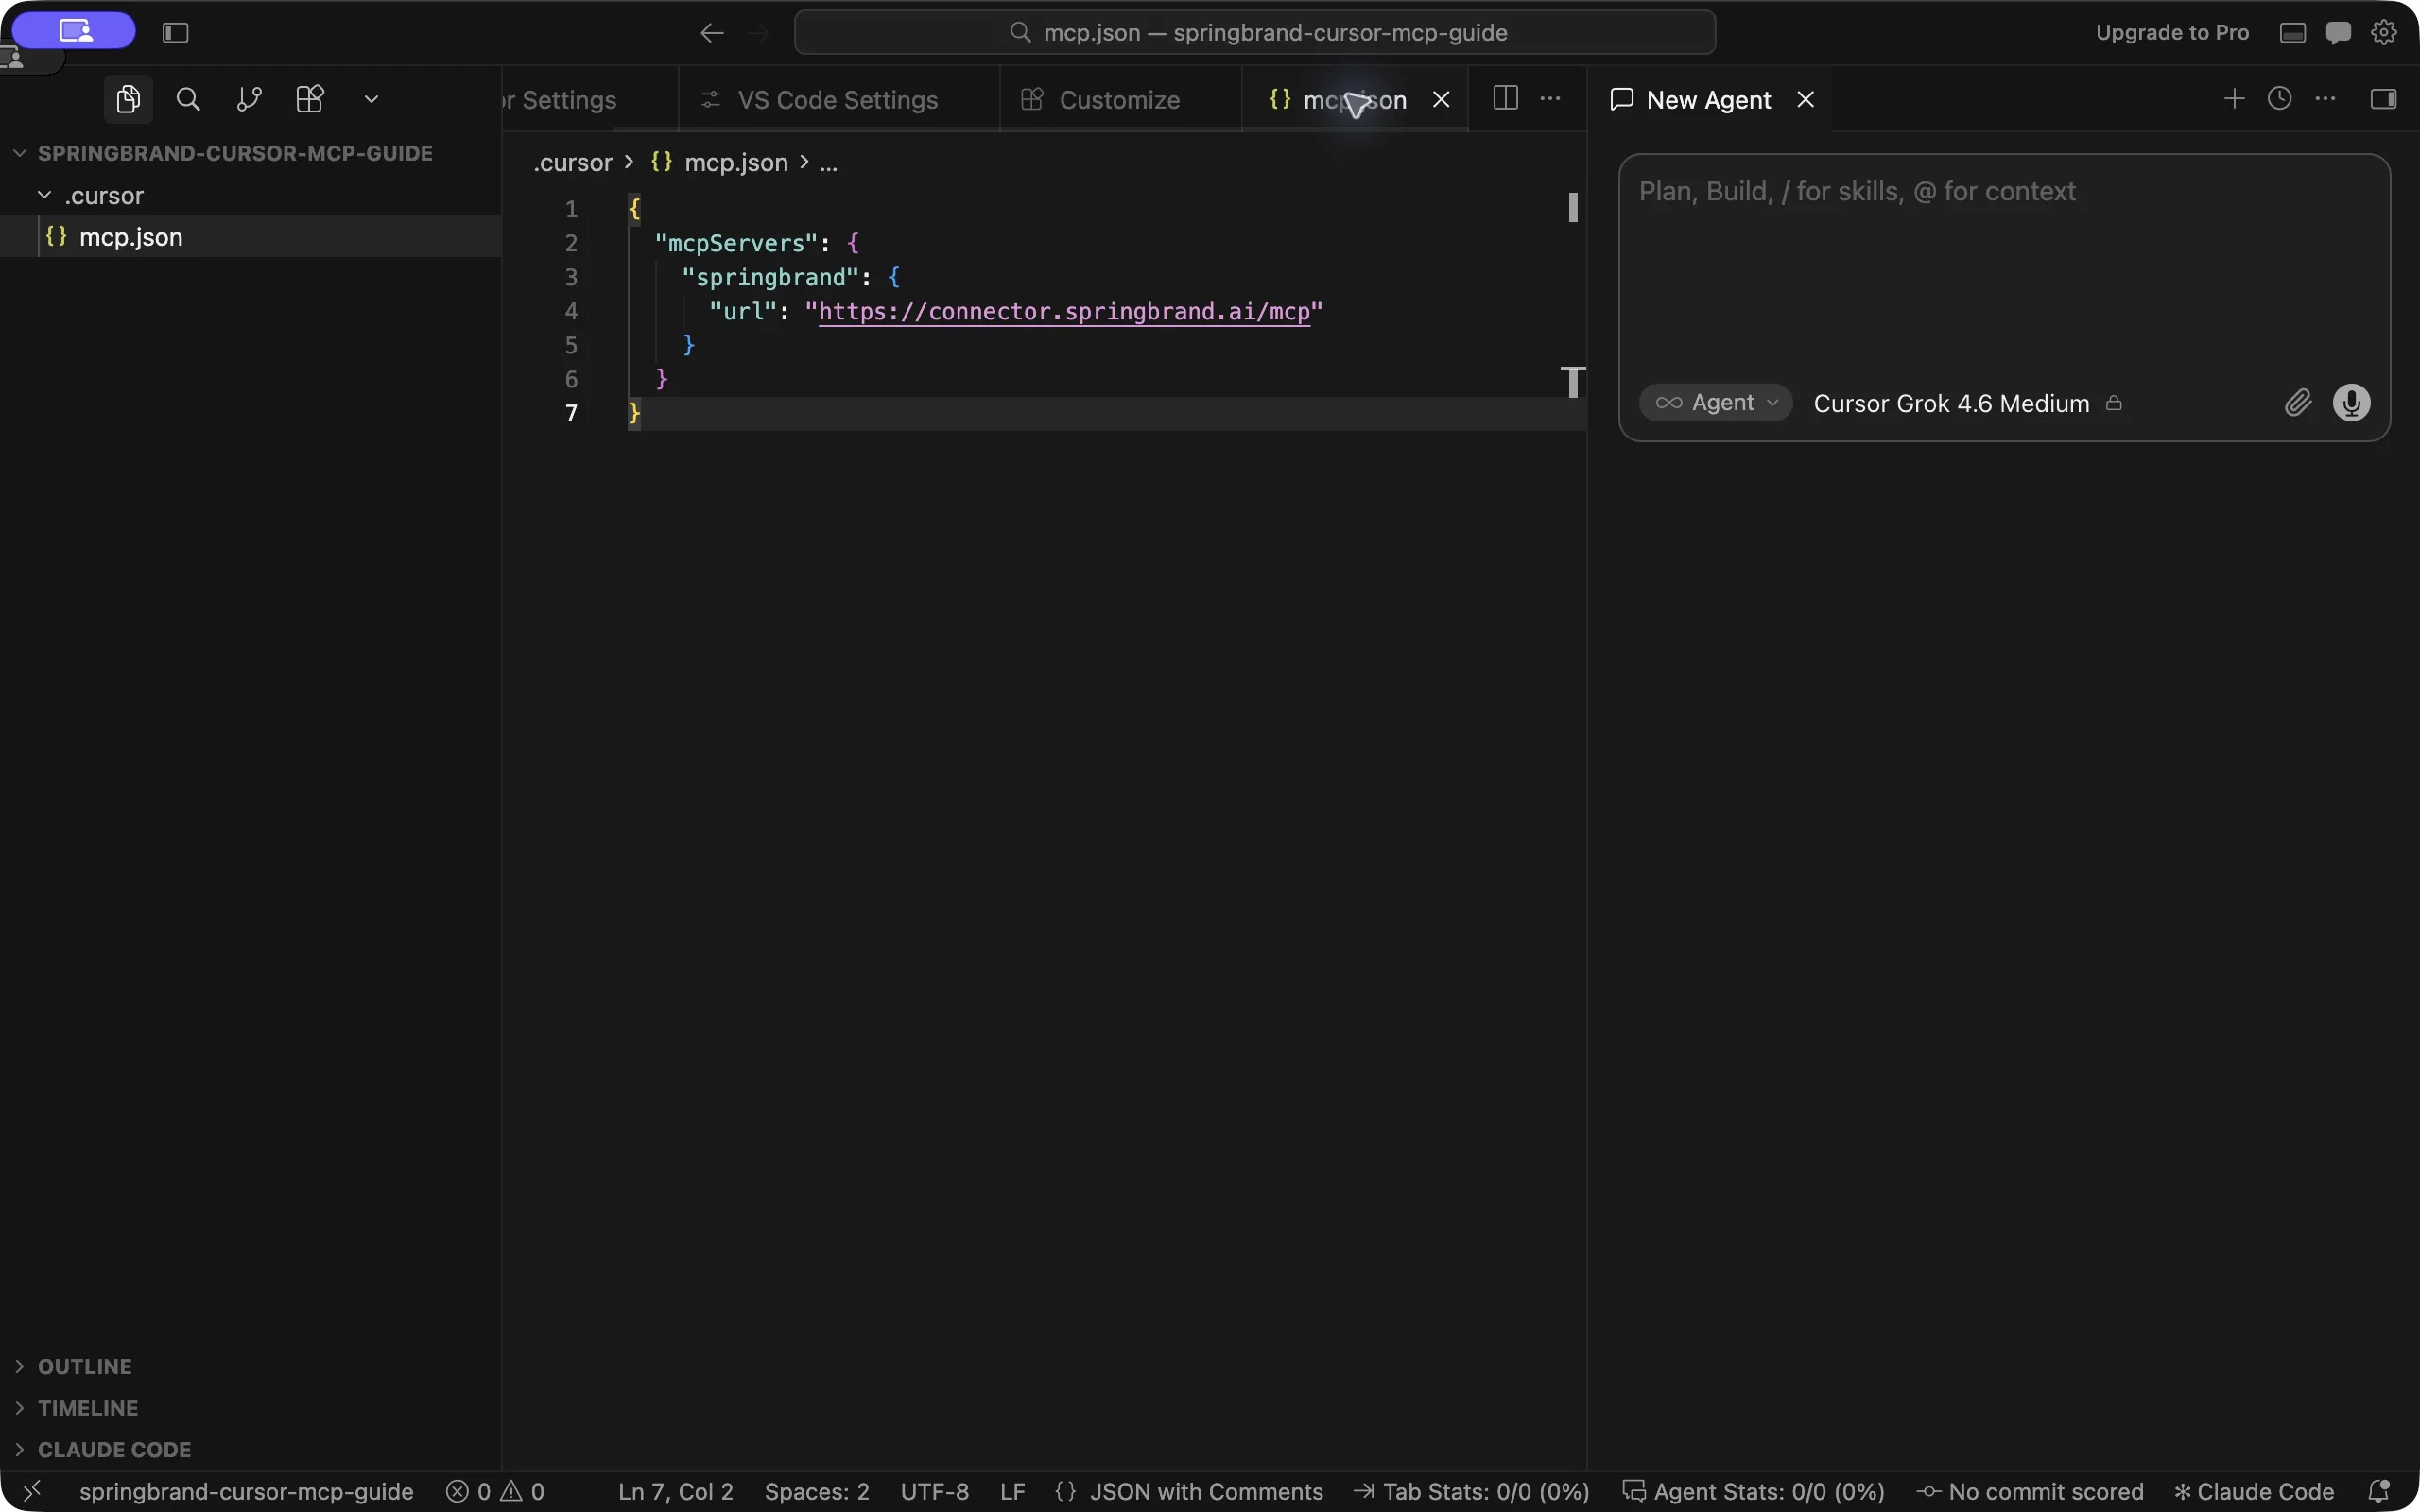
Add this entry inside mcpServers and save the file. If the file is empty, paste the complete example below. Keep any other servers already in the file.
{
  "mcpServers": {
    "springbrand": {
      "url": "https://connector.springbrand.ai/mcp"
    }
  }
}
Return to Customize → MCPs. If SpringBrand does not appear, run Developer: Reload Window from Cursor's command palette. Open the SpringBrand card and switch its source on.
3. Authorize and verify
For the manual MCP setup, select Authenticate on SpringBrand's card. Review the requested access in your browser, then approve it to finish connecting. The card may show Needs authentication before the browser step.
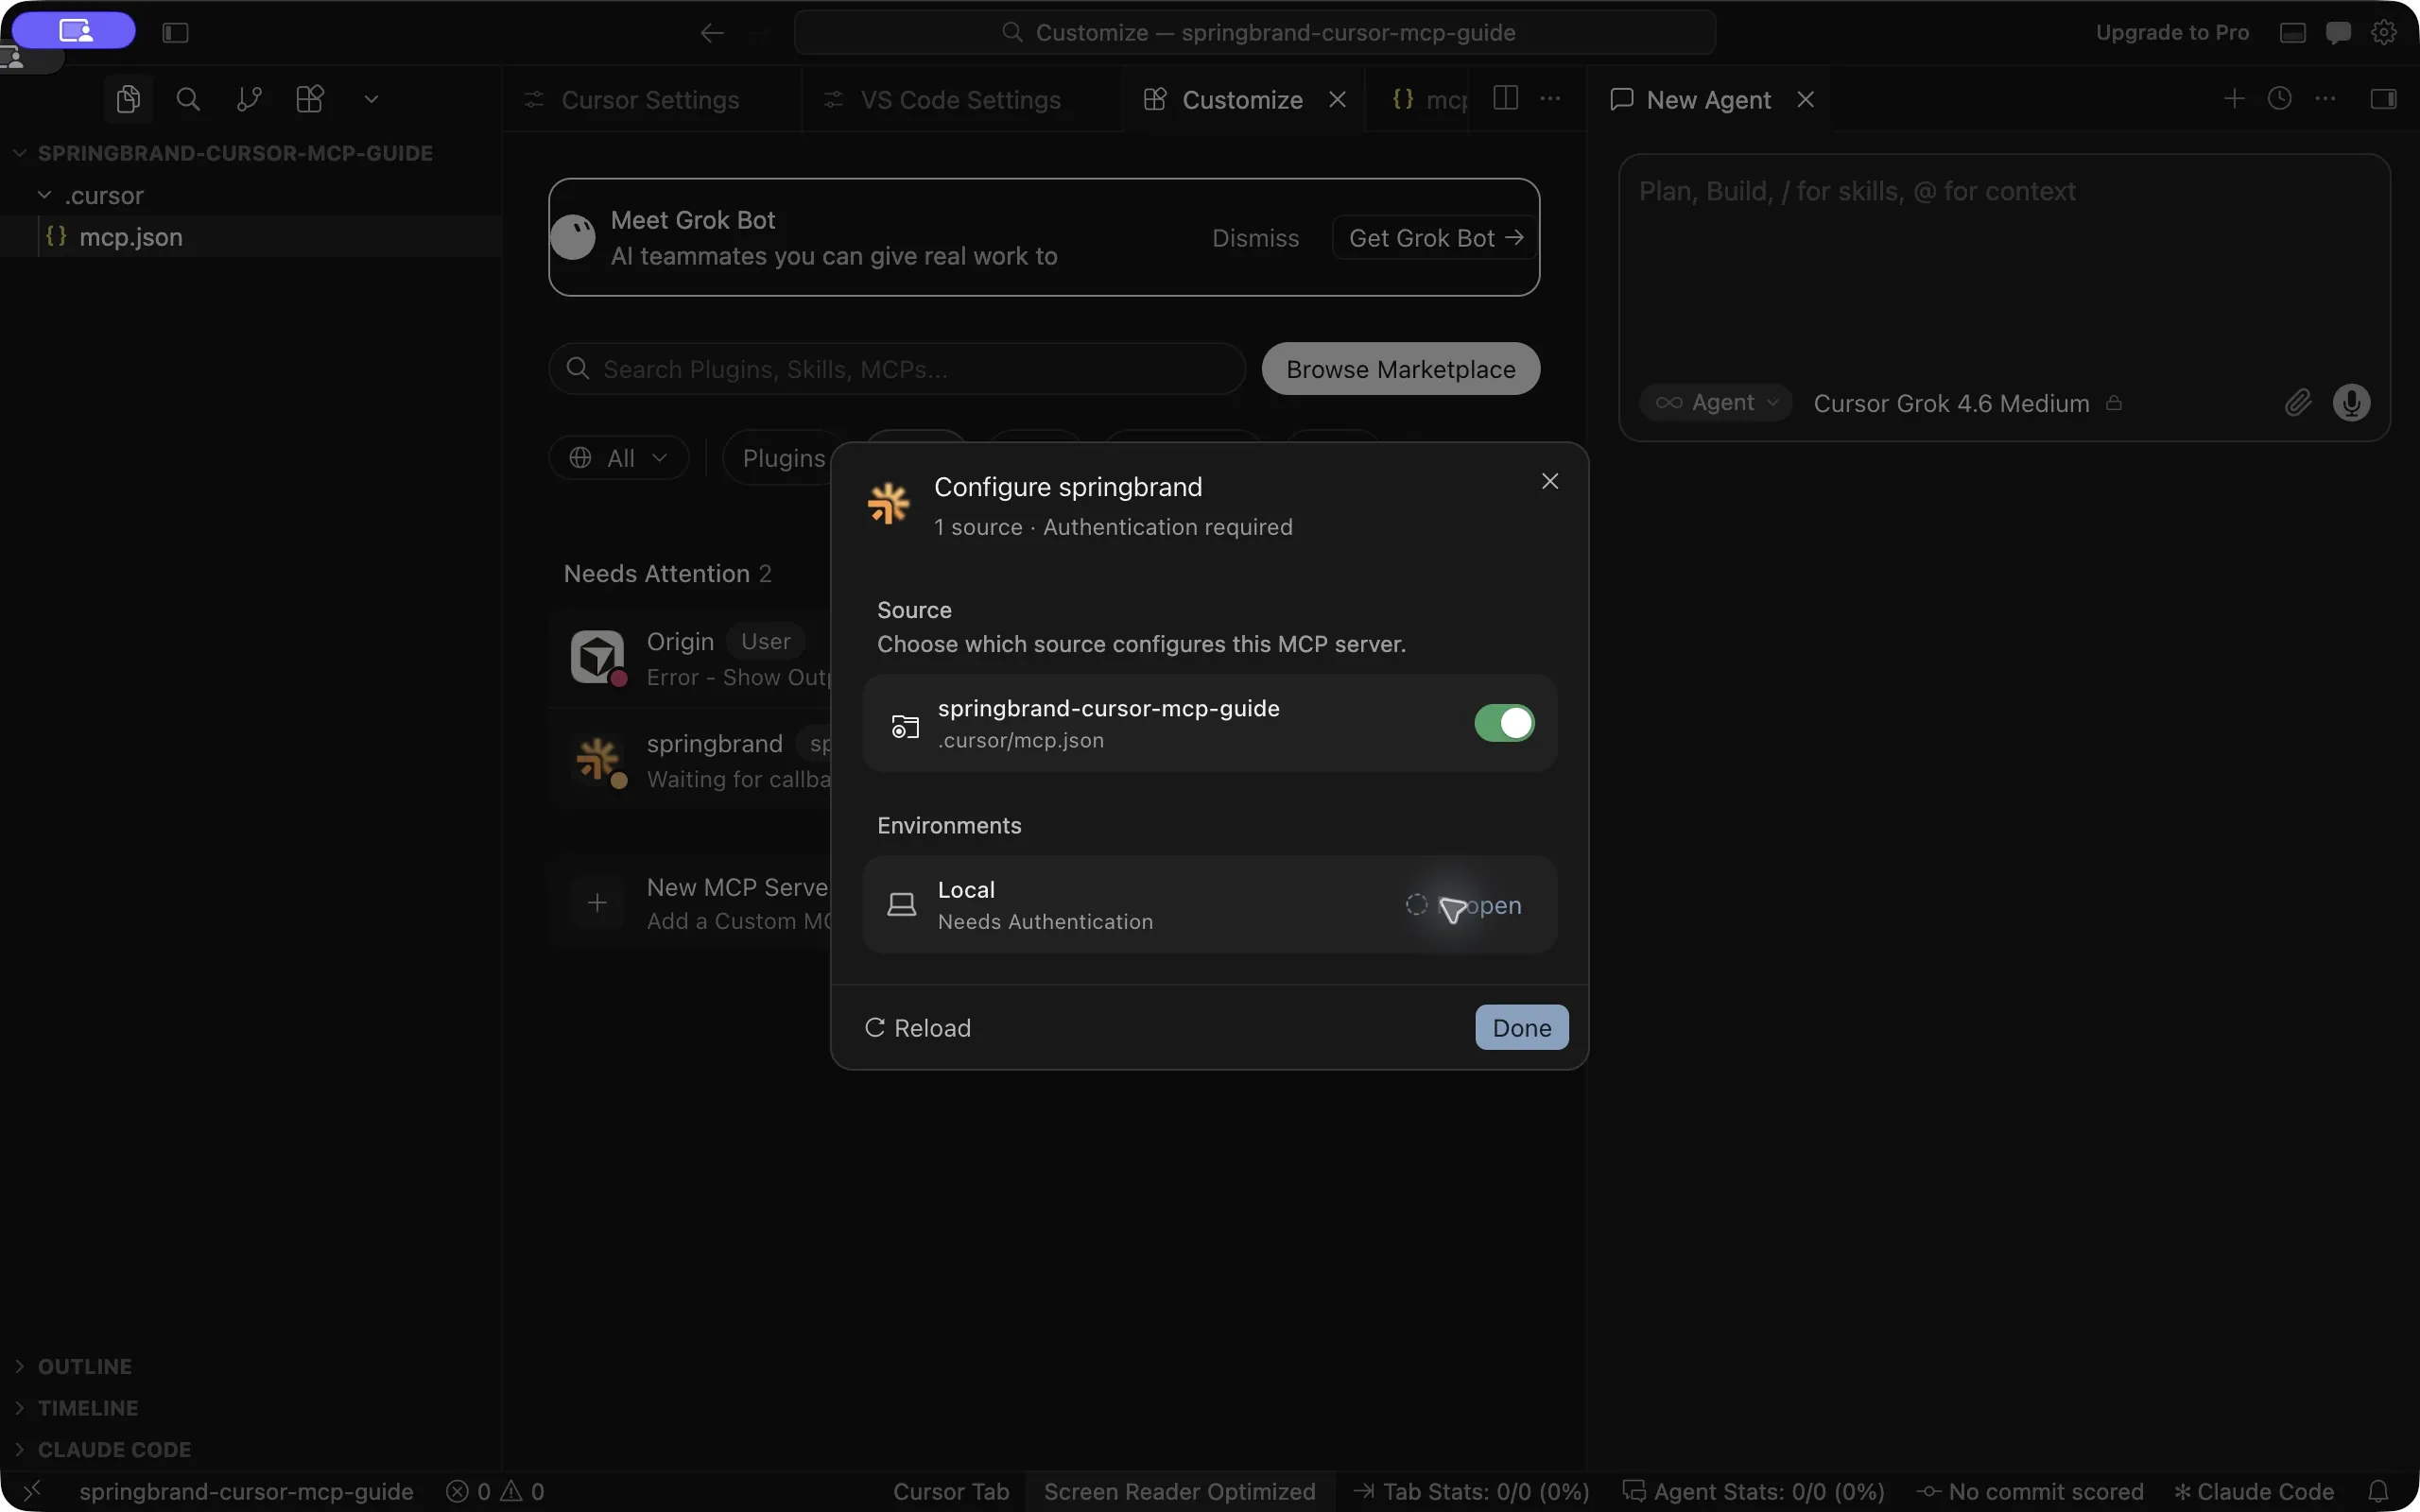
After browser sign-in finishes, open a new Cursor conversation and ask it to show the available SpringBrand tools.